{"id":1582195909,"title":"HANNA HI 8710 pH Analog Controller with Self-Diagnostic Test","handle":"hi-8710","description":"\u003cp\u003e \u003c\/p\u003e\n\u003cdiv id=\"Product-Body\" style=\"width: 475px; clear: left; color: #222222; font-family: Tahoma. Arial. FreeSans. Helvetica. sans-serif; font-size: 12px; line-height: 18px; background-color: #f2f3f3;\"\u003e\n\u003cul style=\"margin: 0px 0px 0px 20px;\"\u003e\n\u003cli\u003eInputs: BNC connector. Direct wire connection with amplified probe (supports HI 1006 series probes) and 4-20 mA from a transmitter\u003c\/li\u003e\n\u003cli\u003eExtended temperature compensation range: -20 to 100°C\u003c\/li\u003e\n\u003cli\u003eSupports potential matching pin connection\u003c\/li\u003e\n\u003cli\u003eBoth 4-20 and 0-20 mA output\u003c\/li\u003e\n\u003cli\u003e±5V outputs for amplified electrodes\u003c\/li\u003e\n\u003cli\u003eBacklit LCD\u003c\/li\u003e\n\u003cli\u003eAuto-diagnostic tests for pH electrode and instrument status\u003c\/li\u003e\n\u003cli\u003eOperational mode LED indicators\u003c\/li\u003e\n\u003cli\u003eFail Safe Function–the alarm relay is activated at power down\u003c\/li\u003e\n\u003cli\u003eTransparent splash-proof cover\u003c\/li\u003e\n\u003c\/ul\u003e\n\u003cp style=\"margin: 0px 0px 15px;\"\u003e \u003c\/p\u003e\n\u003cp style=\"margin: 0px 0px 15px;\"\u003eHI 8710 is a panel mounted pH controller with self-diagnostic test capabilities. Users can set: the setpoint for acid or alkaline dosage. the tolerance of the setpoint before an alarm is activated. the dosage mode: automatic. continuous on or OFF and the over dosage control by setting the overtime dosage knob.\u003c\/p\u003e\n\u003cp style=\"margin: 0px 0px 15px;\"\u003eWhen used in conjunction with the HI 8720 ORP controller. the ODCD* function will ensure that the ORP dosage will start only when the pH level is correct.\u003c\/p\u003e\n\u003cp style=\"margin: 0px 0px 15px;\"\u003e“Overtime dosage” function with selection knob and jumper for disable on the rear panel. If the dosing relay remains continuously activated for more than selected dosing time the alarm relay is activated. the alarm LED is blinking and the dosing relay is deactivated.\u003c\/p\u003e\n\u003cp style=\"margin: 0px 0px 15px;\"\u003e\u003csmall\u003e* ORP dosing consent device\u003c\/small\u003e\u003c\/p\u003e\n\u003cp style=\"margin: 0px 0px 15px;\"\u003e \u003c\/p\u003e\n\u003cp style=\"margin: 0px 0px 15px;\"\u003e\u003cstrong\u003eOrder Information:\u003c\/strong\u003e\u003cbr\u003eThe HI 8710 is supplied complete with mounting brackets and instructions.\u003c\/p\u003e\n\u003c\/div\u003e\n\u003cdiv id=\"TabbedPanels1\" class=\"TabbedPanels\" style=\"margin: 0px; padding: 0px; float: left; clear: none; width: 456.9375px; color: #222222; font-family: Tahoma. Arial. FreeSans. Helvetica. sans-serif; font-size: 12px; line-height: 18px; background-color: #f2f3f3;\"\u003e\n\u003cul class=\"TabbedPanelsTabGroup\" style=\"margin: 0px 0px 0px 20px; padding: 0px;\"\u003e\n\u003cli class=\"TabbedPanelsTab TabbedPanelsTabSelected\" style=\"position: relative; top: 1px; float: left; padding: 2px 4px; margin: 0px 1px 0px 0px; font-weight: bold; line-height: normal; font-family: sans-serif; background-color: #eeeeee; list-style: none; border-style: solid; border-width: 1px; border-color: #999999 #999999 #eeeeee #cccccc; cursor: pointer; font-size: 11px;\"\u003eSpecifications\u003c\/li\u003e\n\u003cli class=\"TabbedPanelsTab\" style=\"position: relative; top: 1px; float: left; padding: 2px 4px; margin: 0px 1px 0px 0px; font-weight: bold; line-height: normal; font-family: sans-serif; background-color: #dddddd; list-style: none; border-style: solid; border-width: 1px; border-color: #999999 #999999 #999999 #cccccc; cursor: pointer; font-size: 11px;\"\u003eAccessories\u003c\/li\u003e\n\u003cli class=\"TabbedPanelsTab\" style=\"position: relative; top: 1px; float: left; padding: 2px 4px; margin: 0px 1px 0px 0px; font-weight: bold; line-height: normal; font-family: sans-serif; background-color: #dddddd; list-style: none; border-style: solid; border-width: 1px; border-color: #999999 #999999 #999999 #cccccc; cursor: pointer; font-size: 11px;\"\u003eDownloads\u003c\/li\u003e\n\u003c\/ul\u003e\n\u003cdiv class=\"TabbedPanelsContentGroup\" style=\"clear: both; border-style: solid; border-width: 1px; border-color: #999999 #999999 #cccccc #cccccc; background-color: #eeeeee;\"\u003e\n\u003cdiv class=\"TabbedPanelsContent TabbedPanelsContentVisible\" style=\"padding: 4px;\"\u003e\n\u003ctable class=\"spec_table\"\u003e\n\u003ctbody\u003e\n\u003ctr\u003e\n\u003ctd\u003e\u003cstrong\u003eRange\u003c\/strong\u003e\u003c\/td\u003e\n\u003ctd\u003e \u003c\/td\u003e\n\u003ctd\u003e\u003csmall\u003e0.00 to 14.00 pH\u003c\/small\u003e\u003c\/td\u003e\n\u003c\/tr\u003e\n\u003ctr\u003e\n\u003ctd\u003e\u003cstrong\u003eResolution\u003c\/strong\u003e\u003c\/td\u003e\n\u003ctd\u003e \u003c\/td\u003e\n\u003ctd\u003e\u003csmall\u003e0.01 pH\u003c\/small\u003e\u003c\/td\u003e\n\u003c\/tr\u003e\n\u003ctr\u003e\n\u003ctd\u003e\u003cstrong\u003eAccuracy\u003cbr\u003e@ 20 °C\u003c\/strong\u003e\u003c\/td\u003e\n\u003ctd\u003e \u003c\/td\u003e\n\u003ctd\u003e\u003csmall\u003e±0.02 pH (0 to 100 °C)\u003cbr\u003e±0.05 pH (-20 to 0 °C)\u003cbr\u003e±0.5% (input from transmitter)\u003c\/small\u003e\u003c\/td\u003e\n\u003c\/tr\u003e\n\u003ctr\u003e\n\u003ctd\u003e\u003cstrong\u003eInput\u003c\/strong\u003e\u003c\/td\u003e\n\u003ctd\u003e \u003c\/td\u003e\n\u003ctd\u003e\u003csmall\u003ehigh impedance 10\u003csup\u003e12\u003c\/sup\u003e Ohm; reference and matching pin inputs are available; 4-20 mA\u003c\/small\u003e\u003c\/td\u003e\n\u003c\/tr\u003e\n\u003ctr\u003e\n\u003ctd\u003e\u003cstrong\u003ePower Output\u003c\/strong\u003e\u003c\/td\u003e\n\u003ctd\u003e \u003c\/td\u003e\n\u003ctd\u003e\u003csmall\u003e±5 Vcc; 150 mA max load for amplified electrodes\u003c\/small\u003e\u003c\/td\u003e\n\u003c\/tr\u003e\n\u003ctr\u003e\n\u003ctd\u003e\u003cstrong\u003eCalibration\u003c\/strong\u003e\u003c\/td\u003e\n\u003ctd\u003e \u003c\/td\u003e\n\u003ctd\u003e\u003csmall\u003eoffset: ±2 pH with OFFSET trimmer\u003cbr\u003eslope: 80 to 110% with SLOPE trimmer\u003c\/small\u003e\u003c\/td\u003e\n\u003c\/tr\u003e\n\u003ctr\u003e\n\u003ctd\u003e\u003cstrong\u003eTemperature\u003cbr\u003eCompensation\u003c\/strong\u003e\u003c\/td\u003e\n\u003ctd\u003e \u003c\/td\u003e\n\u003ctd\u003e\u003csmall\u003efixed or automatic with Pt100. from -20 to 100°C (-4 to 212°F)\u003c\/small\u003e\u003c\/td\u003e\n\u003c\/tr\u003e\n\u003ctr\u003e\n\u003ctd\u003e\u003cstrong\u003eRecorder Output\u003c\/strong\u003e\u003c\/td\u003e\n\u003ctd\u003e \u003c\/td\u003e\n\u003ctd\u003e\u003csmall\u003e0-20 mA or 4-20 mA (isolated)\u003c\/small\u003e\u003c\/td\u003e\n\u003c\/tr\u003e\n\u003ctr\u003e\n\u003ctd\u003e\u003cstrong\u003eSetpoint Relay\u003c\/strong\u003e\u003c\/td\u003e\n\u003ctd\u003e \u003c\/td\u003e\n\u003ctd\u003e\u003csmall\u003e1. isolated. 2 A. max 240 V. resistive load. 1000000 strokes (not fuse protected)\u003c\/small\u003e\u003c\/td\u003e\n\u003c\/tr\u003e\n\u003ctr\u003e\n\u003ctd\u003e\u003cstrong\u003eSetpoint Range\u003c\/strong\u003e\u003c\/td\u003e\n\u003ctd\u003e \u003c\/td\u003e\n\u003ctd\u003e\u003csmall\u003e0.00 to 14.00 pH\u003c\/small\u003e\u003c\/td\u003e\n\u003c\/tr\u003e\n\u003ctr\u003e\n\u003ctd\u003e\u003cstrong\u003eAlarm Relay\u003c\/strong\u003e\u003c\/td\u003e\n\u003ctd\u003e \u003c\/td\u003e\n\u003ctd\u003e\u003csmall\u003e1. isolated. 2 A. max 240 V. resistive load. 1000000 strokes (not fuse protected)\u003c\/small\u003e\u003c\/td\u003e\n\u003c\/tr\u003e\n\u003ctr\u003e\n\u003ctd\u003e\u003cstrong\u003eAlarm Range\u003c\/strong\u003e\u003c\/td\u003e\n\u003ctd\u003e \u003c\/td\u003e\n\u003ctd\u003e\u003csmall\u003e0.2 to 3.00 pH\u003c\/small\u003e\u003c\/td\u003e\n\u003c\/tr\u003e\n\u003ctr\u003e\n\u003ctd\u003e\u003cstrong\u003eConsent Relay\u003c\/strong\u003e\u003c\/td\u003e\n\u003ctd\u003e \u003c\/td\u003e\n\u003ctd\u003e\u003csmall\u003e1. isolated. 2 A. max 240 V. resistive load. 1000000 strokes (not fuse protected)\u003c\/small\u003e\u003c\/td\u003e\n\u003c\/tr\u003e\n\u003ctr\u003e\n\u003ctd\u003e\u003cstrong\u003eDosing Control\u003c\/strong\u003e\u003c\/td\u003e\n\u003ctd\u003e \u003c\/td\u003e\n\u003ctd\u003e\u003csmall\u003eOFF\/AUTO\/ON with selection switch\u003c\/small\u003e\u003c\/td\u003e\n\u003c\/tr\u003e\n\u003ctr\u003e\n\u003ctd\u003e\u003cstrong\u003eOver Dosing Control\u003c\/strong\u003e\u003c\/td\u003e\n\u003ctd\u003e \u003c\/td\u003e\n\u003ctd\u003e\u003csmall\u003eadjustable. from 5 min to 60 min with knob or disable by wire strap - on rear panel\u003c\/small\u003e\u003c\/td\u003e\n\u003c\/tr\u003e\n\u003ctr\u003e\n\u003ctd\u003e\u003cstrong\u003eBacklight\u003c\/strong\u003e\u003c\/td\u003e\n\u003ctd\u003e \u003c\/td\u003e\n\u003ctd\u003e\u003csmall\u003econtinuous on\u003c\/small\u003e\u003c\/td\u003e\n\u003c\/tr\u003e\n\u003ctr\u003e\n\u003ctd\u003e\u003cstrong\u003ePower Supply\u003c\/strong\u003e\u003c\/td\u003e\n\u003ctd\u003e \u003c\/td\u003e\n\u003ctd\u003e\u003csmall\u003e115 VAC ±10% or 230 VAC ±10%; 50\/60 Hz\u003c\/small\u003e\u003c\/td\u003e\n\u003c\/tr\u003e\n\u003ctr\u003e\n\u003ctd\u003e\u003cstrong\u003eEnclosure\u003c\/strong\u003e\u003c\/td\u003e\n\u003ctd\u003e \u003c\/td\u003e\n\u003ctd\u003e\u003csmall\u003eflame retardant ABS body and front panel; transparent splash-proof front cover\u003c\/small\u003e\u003c\/td\u003e\n\u003c\/tr\u003e\n\u003ctr\u003e\n\u003ctd\u003e\u003cstrong\u003eEnvironment\u003c\/strong\u003e\u003c\/td\u003e\n\u003ctd\u003e \u003c\/td\u003e\n\u003ctd\u003e\u003csmall\u003e-10 to 50°C (14 to 122°F); RH max 95% non-condensing\u003c\/small\u003e\u003c\/td\u003e\n\u003c\/tr\u003e\n\u003ctr\u003e\n\u003ctd\u003e\u003cstrong\u003ePanel Cutout\u003c\/strong\u003e\u003c\/td\u003e\n\u003ctd\u003e \u003c\/td\u003e\n\u003ctd\u003e\u003csmall\u003e141 x 69 mm (5.6 x 2.7\")\u003c\/small\u003e\u003c\/td\u003e\n\u003c\/tr\u003e\n\u003ctr\u003e\n\u003ctd\u003e\u003cstrong\u003eWeight\u003c\/strong\u003e\u003c\/td\u003e\n\u003ctd\u003e \u003c\/td\u003e\n\u003ctd\u003e\u003csmall\u003e1 kg (2.2 lb.)\u003c\/small\u003e\u003c\/td\u003e\n\u003c\/tr\u003e\n\u003c\/tbody\u003e\n\u003c\/table\u003e\n\u003ctable class=\"spec_table\" style=\"color: #222222; font-size: 12px; line-height: 18px;\"\u003e\n\u003ctbody\u003e\n\u003ctr\u003e\u003cth\u003eSolutions\u003c\/th\u003e\u003c\/tr\u003e\n\u003ctr\u003e\n\u003ctd\u003e\u003ca style=\"color: #3300ff; text-decoration: none; font-weight: bold;\" href=\"http:\/\/www.hannainst.com\/usa\/prods2.cfm?id=035003\u0026amp;ProdCode=HI%207004\/1L\"\u003eHI 7004\/1L\u003c\/a\u003e\u003c\/td\u003e\n\u003ctd\u003e4.01 pH Buffer Solution\u003cbr\u003e1 x 1 L bottle\u003c\/td\u003e\n\u003c\/tr\u003e\n\u003ctr\u003e\n\u003ctd\u003e\u003ca style=\"color: #3300ff; text-decoration: none; font-weight: bold;\" href=\"http:\/\/www.hannainst.com\/usa\/prods2.cfm?id=035003\u0026amp;ProdCode=HI%207007\/1L\"\u003eHI 7007\/1L\u003c\/a\u003e\u003c\/td\u003e\n\u003ctd\u003e7.01 pH Buffer Solution\u003cbr\u003e1 x 1 L bottle\u003c\/td\u003e\n\u003c\/tr\u003e\n\u003ctr\u003e\n\u003ctd\u003e\u003ca style=\"color: #3300ff; text-decoration: none; font-weight: bold;\" href=\"http:\/\/www.hannainst.com\/usa\/prods2.cfm?id=035003\u0026amp;ProdCode=HI%207010\/1L\"\u003eHI 7010\/1L\u003c\/a\u003e\u003c\/td\u003e\n\u003ctd\u003e10.01 pH Buffer Solution\u003cbr\u003e1 x 1 L bottle\u003c\/td\u003e\n\u003c\/tr\u003e\n\u003ctr\u003e\u003cth\u003eAccessories\u003c\/th\u003e\u003c\/tr\u003e\n\u003ctr\u003e\n\u003ctd\u003e\u003ca style=\"color: #3300ff; text-decoration: none; font-weight: bold;\" href=\"http:\/\/www.hannainst.com\/usa\/prods2.cfm?id=035003\u0026amp;ProdCode=HI%208427\"\u003eHI 8427\u003c\/a\u003e\u003c\/td\u003e\n\u003ctd\u003epH and mV Precision Simulator\u003c\/td\u003e\n\u003c\/tr\u003e\n\u003ctr\u003e\n\u003ctd\u003e\u003ca style=\"color: #3300ff; text-decoration: none; font-weight: bold;\" href=\"http:\/\/www.hannainst.com\/usa\/prods2.cfm?id=035003\u0026amp;ProdCode=HI%20931001\"\u003eHI 931001\u003c\/a\u003e\u003c\/td\u003e\n\u003ctd\u003epH and mV Precision Simulator\u003c\/td\u003e\n\u003c\/tr\u003e\n\u003c\/tbody\u003e\n\u003c\/table\u003e\n\u003cdiv style=\"background-color: #f2f3f3;\"\u003e\u003cstrong\u003eProduct Manuals\u003c\/strong\u003e\u003c\/div\u003e\n\u003cp\u003e\u003cimg style=\"background-color: #f2f3f3;\" src=\"http:\/\/www.hannainst.com\/usa\/images\/icon-pdf.gif\" alt=\"\" width=\"20\" height=\"22\" align=\"absmiddle\" border=\"0\"\u003e\u003cspan style=\"background-color: #f2f3f3;\"\u003e Manual: \u003c\/span\u003e\u003ca style=\"color: #006699; text-decoration: none; font-weight: bold; background-color: #f2f3f3;\" title=\"Download Product Manual\" href=\"http:\/\/www.hannainst.com\/manuals\/manHI_8511_12_8710_11_20.pdf\" target=\"_blank\"\u003eDownload\u003c\/a\u003e\u003c\/p\u003e\n\u003c\/div\u003e\n\u003c\/div\u003e\n\u003c\/div\u003e","published_at":"2026-06-25T15:48:33+12:00","created_at":"2015-09-01T15:20:24+12:00","vendor":"Hanna Instruments","type":"Lab Equipment","tags":["category_Other Accessories","Manufacturer_Hanna Instruments","Type_Lab Equipment"],"price":95950,"price_min":95950,"price_max":95950,"available":true,"price_varies":false,"compare_at_price":null,"compare_at_price_min":0,"compare_at_price_max":0,"compare_at_price_varies":false,"variants":[{"id":4857347397,"title":"Default Title","option1":"Default Title","option2":null,"option3":null,"sku":"HI 8710","requires_shipping":false,"taxable":true,"featured_image":null,"available":true,"name":"HANNA HI 8710 pH Analog Controller with Self-Diagnostic Test","public_title":null,"options":["Default Title"],"price":95950,"weight":0,"compare_at_price":null,"inventory_quantity":1,"inventory_management":null,"inventory_policy":"deny","barcode":null,"requires_selling_plan":false,"selling_plan_allocations":[],"quantity_rule":{"min":1,"max":null,"increment":1}}],"images":["\/\/acornsci.co.nz\/cdn\/shop\/products\/HI8710_200_2015.jpeg?v=1443496006"],"featured_image":"\/\/acornsci.co.nz\/cdn\/shop\/products\/HI8710_200_2015.jpeg?v=1443496006","options":["Title"],"media":[{"alt":null,"id":21312471139,"position":1,"preview_image":{"aspect_ratio":1.0,"height":200,"width":200,"src":"\/\/acornsci.co.nz\/cdn\/shop\/products\/HI8710_200_2015.jpeg?v=1443496006"},"aspect_ratio":1.0,"height":200,"media_type":"image","src":"\/\/acornsci.co.nz\/cdn\/shop\/products\/HI8710_200_2015.jpeg?v=1443496006","width":200}],"requires_selling_plan":false,"selling_plan_groups":[],"content":"\u003cp\u003e \u003c\/p\u003e\n\u003cdiv id=\"Product-Body\" style=\"width: 475px; clear: left; color: #222222; font-family: Tahoma. Arial. FreeSans. Helvetica. sans-serif; font-size: 12px; line-height: 18px; background-color: #f2f3f3;\"\u003e\n\u003cul style=\"margin: 0px 0px 0px 20px;\"\u003e\n\u003cli\u003eInputs: BNC connector. Direct wire connection with amplified probe (supports HI 1006 series probes) and 4-20 mA from a transmitter\u003c\/li\u003e\n\u003cli\u003eExtended temperature compensation range: -20 to 100°C\u003c\/li\u003e\n\u003cli\u003eSupports potential matching pin connection\u003c\/li\u003e\n\u003cli\u003eBoth 4-20 and 0-20 mA output\u003c\/li\u003e\n\u003cli\u003e±5V outputs for amplified electrodes\u003c\/li\u003e\n\u003cli\u003eBacklit LCD\u003c\/li\u003e\n\u003cli\u003eAuto-diagnostic tests for pH electrode and instrument status\u003c\/li\u003e\n\u003cli\u003eOperational mode LED indicators\u003c\/li\u003e\n\u003cli\u003eFail Safe Function–the alarm relay is activated at power down\u003c\/li\u003e\n\u003cli\u003eTransparent splash-proof cover\u003c\/li\u003e\n\u003c\/ul\u003e\n\u003cp style=\"margin: 0px 0px 15px;\"\u003e \u003c\/p\u003e\n\u003cp style=\"margin: 0px 0px 15px;\"\u003eHI 8710 is a panel mounted pH controller with self-diagnostic test capabilities. Users can set: the setpoint for acid or alkaline dosage. the tolerance of the setpoint before an alarm is activated. the dosage mode: automatic. continuous on or OFF and the over dosage control by setting the overtime dosage knob.\u003c\/p\u003e\n\u003cp style=\"margin: 0px 0px 15px;\"\u003eWhen used in conjunction with the HI 8720 ORP controller. the ODCD* function will ensure that the ORP dosage will start only when the pH level is correct.\u003c\/p\u003e\n\u003cp style=\"margin: 0px 0px 15px;\"\u003e“Overtime dosage” function with selection knob and jumper for disable on the rear panel. If the dosing relay remains continuously activated for more than selected dosing time the alarm relay is activated. the alarm LED is blinking and the dosing relay is deactivated.\u003c\/p\u003e\n\u003cp style=\"margin: 0px 0px 15px;\"\u003e\u003csmall\u003e* ORP dosing consent device\u003c\/small\u003e\u003c\/p\u003e\n\u003cp style=\"margin: 0px 0px 15px;\"\u003e \u003c\/p\u003e\n\u003cp style=\"margin: 0px 0px 15px;\"\u003e\u003cstrong\u003eOrder Information:\u003c\/strong\u003e\u003cbr\u003eThe HI 8710 is supplied complete with mounting brackets and instructions.\u003c\/p\u003e\n\u003c\/div\u003e\n\u003cdiv id=\"TabbedPanels1\" class=\"TabbedPanels\" style=\"margin: 0px; padding: 0px; float: left; clear: none; width: 456.9375px; color: #222222; font-family: Tahoma. Arial. FreeSans. Helvetica. sans-serif; font-size: 12px; line-height: 18px; background-color: #f2f3f3;\"\u003e\n\u003cul class=\"TabbedPanelsTabGroup\" style=\"margin: 0px 0px 0px 20px; padding: 0px;\"\u003e\n\u003cli class=\"TabbedPanelsTab TabbedPanelsTabSelected\" style=\"position: relative; top: 1px; float: left; padding: 2px 4px; margin: 0px 1px 0px 0px; font-weight: bold; line-height: normal; font-family: sans-serif; background-color: #eeeeee; list-style: none; border-style: solid; border-width: 1px; border-color: #999999 #999999 #eeeeee #cccccc; cursor: pointer; font-size: 11px;\"\u003eSpecifications\u003c\/li\u003e\n\u003cli class=\"TabbedPanelsTab\" style=\"position: relative; top: 1px; float: left; padding: 2px 4px; margin: 0px 1px 0px 0px; font-weight: bold; line-height: normal; font-family: sans-serif; background-color: #dddddd; list-style: none; border-style: solid; border-width: 1px; border-color: #999999 #999999 #999999 #cccccc; cursor: pointer; font-size: 11px;\"\u003eAccessories\u003c\/li\u003e\n\u003cli class=\"TabbedPanelsTab\" style=\"position: relative; top: 1px; float: left; padding: 2px 4px; margin: 0px 1px 0px 0px; font-weight: bold; line-height: normal; font-family: sans-serif; background-color: #dddddd; list-style: none; border-style: solid; border-width: 1px; border-color: #999999 #999999 #999999 #cccccc; cursor: pointer; font-size: 11px;\"\u003eDownloads\u003c\/li\u003e\n\u003c\/ul\u003e\n\u003cdiv class=\"TabbedPanelsContentGroup\" style=\"clear: both; border-style: solid; border-width: 1px; border-color: #999999 #999999 #cccccc #cccccc; background-color: #eeeeee;\"\u003e\n\u003cdiv class=\"TabbedPanelsContent TabbedPanelsContentVisible\" style=\"padding: 4px;\"\u003e\n\u003ctable class=\"spec_table\"\u003e\n\u003ctbody\u003e\n\u003ctr\u003e\n\u003ctd\u003e\u003cstrong\u003eRange\u003c\/strong\u003e\u003c\/td\u003e\n\u003ctd\u003e \u003c\/td\u003e\n\u003ctd\u003e\u003csmall\u003e0.00 to 14.00 pH\u003c\/small\u003e\u003c\/td\u003e\n\u003c\/tr\u003e\n\u003ctr\u003e\n\u003ctd\u003e\u003cstrong\u003eResolution\u003c\/strong\u003e\u003c\/td\u003e\n\u003ctd\u003e \u003c\/td\u003e\n\u003ctd\u003e\u003csmall\u003e0.01 pH\u003c\/small\u003e\u003c\/td\u003e\n\u003c\/tr\u003e\n\u003ctr\u003e\n\u003ctd\u003e\u003cstrong\u003eAccuracy\u003cbr\u003e@ 20 °C\u003c\/strong\u003e\u003c\/td\u003e\n\u003ctd\u003e \u003c\/td\u003e\n\u003ctd\u003e\u003csmall\u003e±0.02 pH (0 to 100 °C)\u003cbr\u003e±0.05 pH (-20 to 0 °C)\u003cbr\u003e±0.5% (input from transmitter)\u003c\/small\u003e\u003c\/td\u003e\n\u003c\/tr\u003e\n\u003ctr\u003e\n\u003ctd\u003e\u003cstrong\u003eInput\u003c\/strong\u003e\u003c\/td\u003e\n\u003ctd\u003e \u003c\/td\u003e\n\u003ctd\u003e\u003csmall\u003ehigh impedance 10\u003csup\u003e12\u003c\/sup\u003e Ohm; reference and matching pin inputs are available; 4-20 mA\u003c\/small\u003e\u003c\/td\u003e\n\u003c\/tr\u003e\n\u003ctr\u003e\n\u003ctd\u003e\u003cstrong\u003ePower Output\u003c\/strong\u003e\u003c\/td\u003e\n\u003ctd\u003e \u003c\/td\u003e\n\u003ctd\u003e\u003csmall\u003e±5 Vcc; 150 mA max load for amplified electrodes\u003c\/small\u003e\u003c\/td\u003e\n\u003c\/tr\u003e\n\u003ctr\u003e\n\u003ctd\u003e\u003cstrong\u003eCalibration\u003c\/strong\u003e\u003c\/td\u003e\n\u003ctd\u003e \u003c\/td\u003e\n\u003ctd\u003e\u003csmall\u003eoffset: ±2 pH with OFFSET trimmer\u003cbr\u003eslope: 80 to 110% with SLOPE trimmer\u003c\/small\u003e\u003c\/td\u003e\n\u003c\/tr\u003e\n\u003ctr\u003e\n\u003ctd\u003e\u003cstrong\u003eTemperature\u003cbr\u003eCompensation\u003c\/strong\u003e\u003c\/td\u003e\n\u003ctd\u003e \u003c\/td\u003e\n\u003ctd\u003e\u003csmall\u003efixed or automatic with Pt100. from -20 to 100°C (-4 to 212°F)\u003c\/small\u003e\u003c\/td\u003e\n\u003c\/tr\u003e\n\u003ctr\u003e\n\u003ctd\u003e\u003cstrong\u003eRecorder Output\u003c\/strong\u003e\u003c\/td\u003e\n\u003ctd\u003e \u003c\/td\u003e\n\u003ctd\u003e\u003csmall\u003e0-20 mA or 4-20 mA (isolated)\u003c\/small\u003e\u003c\/td\u003e\n\u003c\/tr\u003e\n\u003ctr\u003e\n\u003ctd\u003e\u003cstrong\u003eSetpoint Relay\u003c\/strong\u003e\u003c\/td\u003e\n\u003ctd\u003e \u003c\/td\u003e\n\u003ctd\u003e\u003csmall\u003e1. isolated. 2 A. max 240 V. resistive load. 1000000 strokes (not fuse protected)\u003c\/small\u003e\u003c\/td\u003e\n\u003c\/tr\u003e\n\u003ctr\u003e\n\u003ctd\u003e\u003cstrong\u003eSetpoint Range\u003c\/strong\u003e\u003c\/td\u003e\n\u003ctd\u003e \u003c\/td\u003e\n\u003ctd\u003e\u003csmall\u003e0.00 to 14.00 pH\u003c\/small\u003e\u003c\/td\u003e\n\u003c\/tr\u003e\n\u003ctr\u003e\n\u003ctd\u003e\u003cstrong\u003eAlarm Relay\u003c\/strong\u003e\u003c\/td\u003e\n\u003ctd\u003e \u003c\/td\u003e\n\u003ctd\u003e\u003csmall\u003e1. isolated. 2 A. max 240 V. resistive load. 1000000 strokes (not fuse protected)\u003c\/small\u003e\u003c\/td\u003e\n\u003c\/tr\u003e\n\u003ctr\u003e\n\u003ctd\u003e\u003cstrong\u003eAlarm Range\u003c\/strong\u003e\u003c\/td\u003e\n\u003ctd\u003e \u003c\/td\u003e\n\u003ctd\u003e\u003csmall\u003e0.2 to 3.00 pH\u003c\/small\u003e\u003c\/td\u003e\n\u003c\/tr\u003e\n\u003ctr\u003e\n\u003ctd\u003e\u003cstrong\u003eConsent Relay\u003c\/strong\u003e\u003c\/td\u003e\n\u003ctd\u003e \u003c\/td\u003e\n\u003ctd\u003e\u003csmall\u003e1. isolated. 2 A. max 240 V. resistive load. 1000000 strokes (not fuse protected)\u003c\/small\u003e\u003c\/td\u003e\n\u003c\/tr\u003e\n\u003ctr\u003e\n\u003ctd\u003e\u003cstrong\u003eDosing Control\u003c\/strong\u003e\u003c\/td\u003e\n\u003ctd\u003e \u003c\/td\u003e\n\u003ctd\u003e\u003csmall\u003eOFF\/AUTO\/ON with selection switch\u003c\/small\u003e\u003c\/td\u003e\n\u003c\/tr\u003e\n\u003ctr\u003e\n\u003ctd\u003e\u003cstrong\u003eOver Dosing Control\u003c\/strong\u003e\u003c\/td\u003e\n\u003ctd\u003e \u003c\/td\u003e\n\u003ctd\u003e\u003csmall\u003eadjustable. from 5 min to 60 min with knob or disable by wire strap - on rear panel\u003c\/small\u003e\u003c\/td\u003e\n\u003c\/tr\u003e\n\u003ctr\u003e\n\u003ctd\u003e\u003cstrong\u003eBacklight\u003c\/strong\u003e\u003c\/td\u003e\n\u003ctd\u003e \u003c\/td\u003e\n\u003ctd\u003e\u003csmall\u003econtinuous on\u003c\/small\u003e\u003c\/td\u003e\n\u003c\/tr\u003e\n\u003ctr\u003e\n\u003ctd\u003e\u003cstrong\u003ePower Supply\u003c\/strong\u003e\u003c\/td\u003e\n\u003ctd\u003e \u003c\/td\u003e\n\u003ctd\u003e\u003csmall\u003e115 VAC ±10% or 230 VAC ±10%; 50\/60 Hz\u003c\/small\u003e\u003c\/td\u003e\n\u003c\/tr\u003e\n\u003ctr\u003e\n\u003ctd\u003e\u003cstrong\u003eEnclosure\u003c\/strong\u003e\u003c\/td\u003e\n\u003ctd\u003e \u003c\/td\u003e\n\u003ctd\u003e\u003csmall\u003eflame retardant ABS body and front panel; transparent splash-proof front cover\u003c\/small\u003e\u003c\/td\u003e\n\u003c\/tr\u003e\n\u003ctr\u003e\n\u003ctd\u003e\u003cstrong\u003eEnvironment\u003c\/strong\u003e\u003c\/td\u003e\n\u003ctd\u003e \u003c\/td\u003e\n\u003ctd\u003e\u003csmall\u003e-10 to 50°C (14 to 122°F); RH max 95% non-condensing\u003c\/small\u003e\u003c\/td\u003e\n\u003c\/tr\u003e\n\u003ctr\u003e\n\u003ctd\u003e\u003cstrong\u003ePanel Cutout\u003c\/strong\u003e\u003c\/td\u003e\n\u003ctd\u003e \u003c\/td\u003e\n\u003ctd\u003e\u003csmall\u003e141 x 69 mm (5.6 x 2.7\")\u003c\/small\u003e\u003c\/td\u003e\n\u003c\/tr\u003e\n\u003ctr\u003e\n\u003ctd\u003e\u003cstrong\u003eWeight\u003c\/strong\u003e\u003c\/td\u003e\n\u003ctd\u003e \u003c\/td\u003e\n\u003ctd\u003e\u003csmall\u003e1 kg (2.2 lb.)\u003c\/small\u003e\u003c\/td\u003e\n\u003c\/tr\u003e\n\u003c\/tbody\u003e\n\u003c\/table\u003e\n\u003ctable class=\"spec_table\" style=\"color: #222222; font-size: 12px; line-height: 18px;\"\u003e\n\u003ctbody\u003e\n\u003ctr\u003e\u003cth\u003eSolutions\u003c\/th\u003e\u003c\/tr\u003e\n\u003ctr\u003e\n\u003ctd\u003e\u003ca style=\"color: #3300ff; text-decoration: none; font-weight: bold;\" href=\"http:\/\/www.hannainst.com\/usa\/prods2.cfm?id=035003\u0026amp;ProdCode=HI%207004\/1L\"\u003eHI 7004\/1L\u003c\/a\u003e\u003c\/td\u003e\n\u003ctd\u003e4.01 pH Buffer Solution\u003cbr\u003e1 x 1 L bottle\u003c\/td\u003e\n\u003c\/tr\u003e\n\u003ctr\u003e\n\u003ctd\u003e\u003ca style=\"color: #3300ff; text-decoration: none; font-weight: bold;\" href=\"http:\/\/www.hannainst.com\/usa\/prods2.cfm?id=035003\u0026amp;ProdCode=HI%207007\/1L\"\u003eHI 7007\/1L\u003c\/a\u003e\u003c\/td\u003e\n\u003ctd\u003e7.01 pH Buffer Solution\u003cbr\u003e1 x 1 L bottle\u003c\/td\u003e\n\u003c\/tr\u003e\n\u003ctr\u003e\n\u003ctd\u003e\u003ca style=\"color: #3300ff; text-decoration: none; font-weight: bold;\" href=\"http:\/\/www.hannainst.com\/usa\/prods2.cfm?id=035003\u0026amp;ProdCode=HI%207010\/1L\"\u003eHI 7010\/1L\u003c\/a\u003e\u003c\/td\u003e\n\u003ctd\u003e10.01 pH Buffer Solution\u003cbr\u003e1 x 1 L bottle\u003c\/td\u003e\n\u003c\/tr\u003e\n\u003ctr\u003e\u003cth\u003eAccessories\u003c\/th\u003e\u003c\/tr\u003e\n\u003ctr\u003e\n\u003ctd\u003e\u003ca style=\"color: #3300ff; text-decoration: none; font-weight: bold;\" href=\"http:\/\/www.hannainst.com\/usa\/prods2.cfm?id=035003\u0026amp;ProdCode=HI%208427\"\u003eHI 8427\u003c\/a\u003e\u003c\/td\u003e\n\u003ctd\u003epH and mV Precision Simulator\u003c\/td\u003e\n\u003c\/tr\u003e\n\u003ctr\u003e\n\u003ctd\u003e\u003ca style=\"color: #3300ff; text-decoration: none; font-weight: bold;\" href=\"http:\/\/www.hannainst.com\/usa\/prods2.cfm?id=035003\u0026amp;ProdCode=HI%20931001\"\u003eHI 931001\u003c\/a\u003e\u003c\/td\u003e\n\u003ctd\u003epH and mV Precision Simulator\u003c\/td\u003e\n\u003c\/tr\u003e\n\u003c\/tbody\u003e\n\u003c\/table\u003e\n\u003cdiv style=\"background-color: #f2f3f3;\"\u003e\u003cstrong\u003eProduct Manuals\u003c\/strong\u003e\u003c\/div\u003e\n\u003cp\u003e\u003cimg style=\"background-color: #f2f3f3;\" src=\"http:\/\/www.hannainst.com\/usa\/images\/icon-pdf.gif\" alt=\"\" width=\"20\" height=\"22\" align=\"absmiddle\" border=\"0\"\u003e\u003cspan style=\"background-color: #f2f3f3;\"\u003e Manual: \u003c\/span\u003e\u003ca style=\"color: #006699; text-decoration: none; font-weight: bold; background-color: #f2f3f3;\" title=\"Download Product Manual\" href=\"http:\/\/www.hannainst.com\/manuals\/manHI_8511_12_8710_11_20.pdf\" target=\"_blank\"\u003eDownload\u003c\/a\u003e\u003c\/p\u003e\n\u003c\/div\u003e\n\u003c\/div\u003e\n\u003c\/div\u003e"}
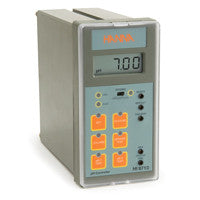
HANNA HI 8710 pH Analog Controller with Self-Diagnostic Test

Related Products
Sale
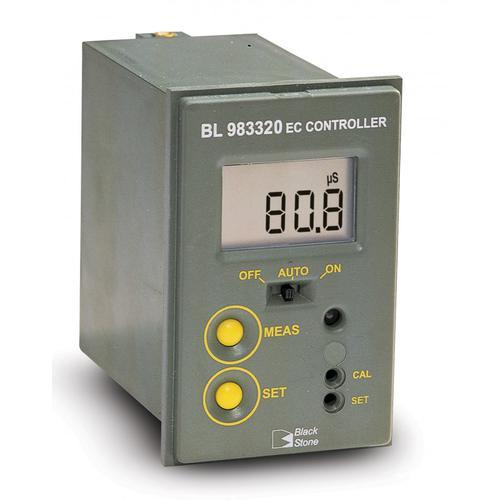
HANNA BL983320-1 Conductivity Mini Controller @ 199.9 µS/cm
$350.00 $465.00